推奨:スクロール表作成手順
ステップ1
まずこれを、cssに追加
.scrollable-table table{
border-collapse: collapse;
margin: 2em 0;
max-width: 100%;
}
.scrollable-table th{
background-color: #eee;
}
.scrollable-table th,
.scrollable-table td{
border: solid 1px #ccc;
padding: 3px 5px;
white-space: nowrap;
}
.scrollable-table {
overflow-x: auto;
margin-bottom: 1em;
max-width: 770px;
}
ステップ2
作成した表のtableタグを
<div class="scrollable-table">
のdivタグで囲む
2軍の方法↓↓
スクロール付の表を作成するとき
まず、functions.phpにコードを追加
//横スクロールレスポンシブテーブル用の要素の追加
add_filter(‘the_content’, function ($the_content) {
$the_content = preg_replace(‘/<table/i’, ‘<div class=”scrollable-table”><table’, $the_content);
$the_content = preg_replace(‘/<\/table>/i’, ‘</table></div>’, $the_content);
return $the_content;
});
次にstyle.cssにスタイルを追加
.scrollable-table table{
border-collapse: collapse;
margin: 1em 0;
max-width: 100%;
}
.scrollable-table th{
background-color: #eee;
}
.scrollable-table th,
.scrollable-table td{
border: solid 1px #ccc;
padding: 3px 5px;
white-space: nowrap;
}
.scrollable-table {
overflow-x: auto;
margin-bottom: 1em;
}
【Simple Custom CSS】を入れている場合は、そこに追加すること
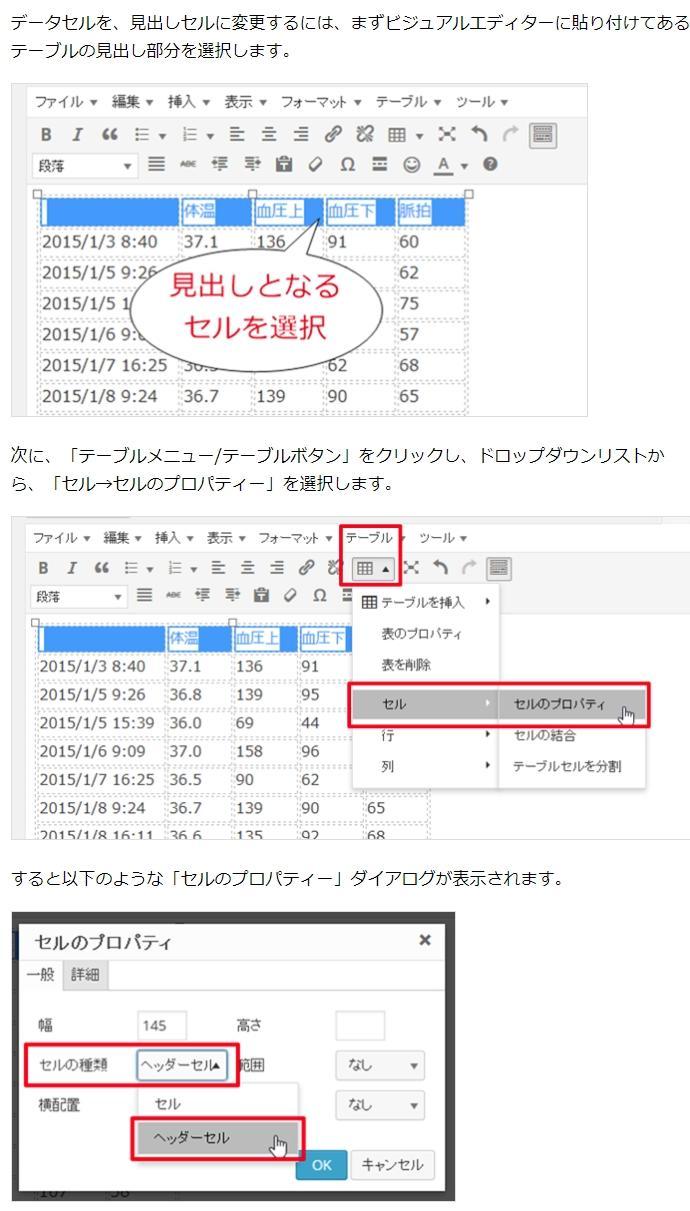
1行目を見出しに

参考
ttps://nelog.jp/excel-table-to-wordpress
ttps://nelog.jp/scrollable-table